源代码: https://github.com/shawnau/ustcsse_scraper
0. 准备工作
首先介绍下需要安装的组件:
- selenium, 自动化测试工具, 本文会通过它操纵phantomJS, 使得爬虫能做出模仿普通用户的操作, 基于python的selenium指南请参考官方文档, 本文将会较重度地使用selenium.
- phantomJS, 简单说这就是个可以静默运行的浏览器模拟器, 具体安装事项请看官方文档, 这篇文章并不会过多地使用它
- beautifulsoup, 做过静态网页爬虫的朋友应该都很熟悉了. 同样, 这篇文章并不会过多地使用它, 因为需要爬的是动态网页, 只把它作为简单的html分析器使用
- Firefox, 主要是使用FirePath和HttpFox插件来分析网页, 关于xPath, 详见xPath教程, 本文并不要求掌握.
除此之外, 本文默认读者具备最基础的python(2.7)知识和正则表达式知识.有关python和正则表达式的知识详见: The Python Tutorial, 正则表达式30分钟入门教程, Python Regular Expressions, re module的官方文档
1. 模拟登录并保存cookies
1.1 使用selenium打开网页
首先看一下我们需要爬取的网站: http://mis.sse.ustc.edu.cn/
(恩..教务网..a little private for my 1st web scraper lol)
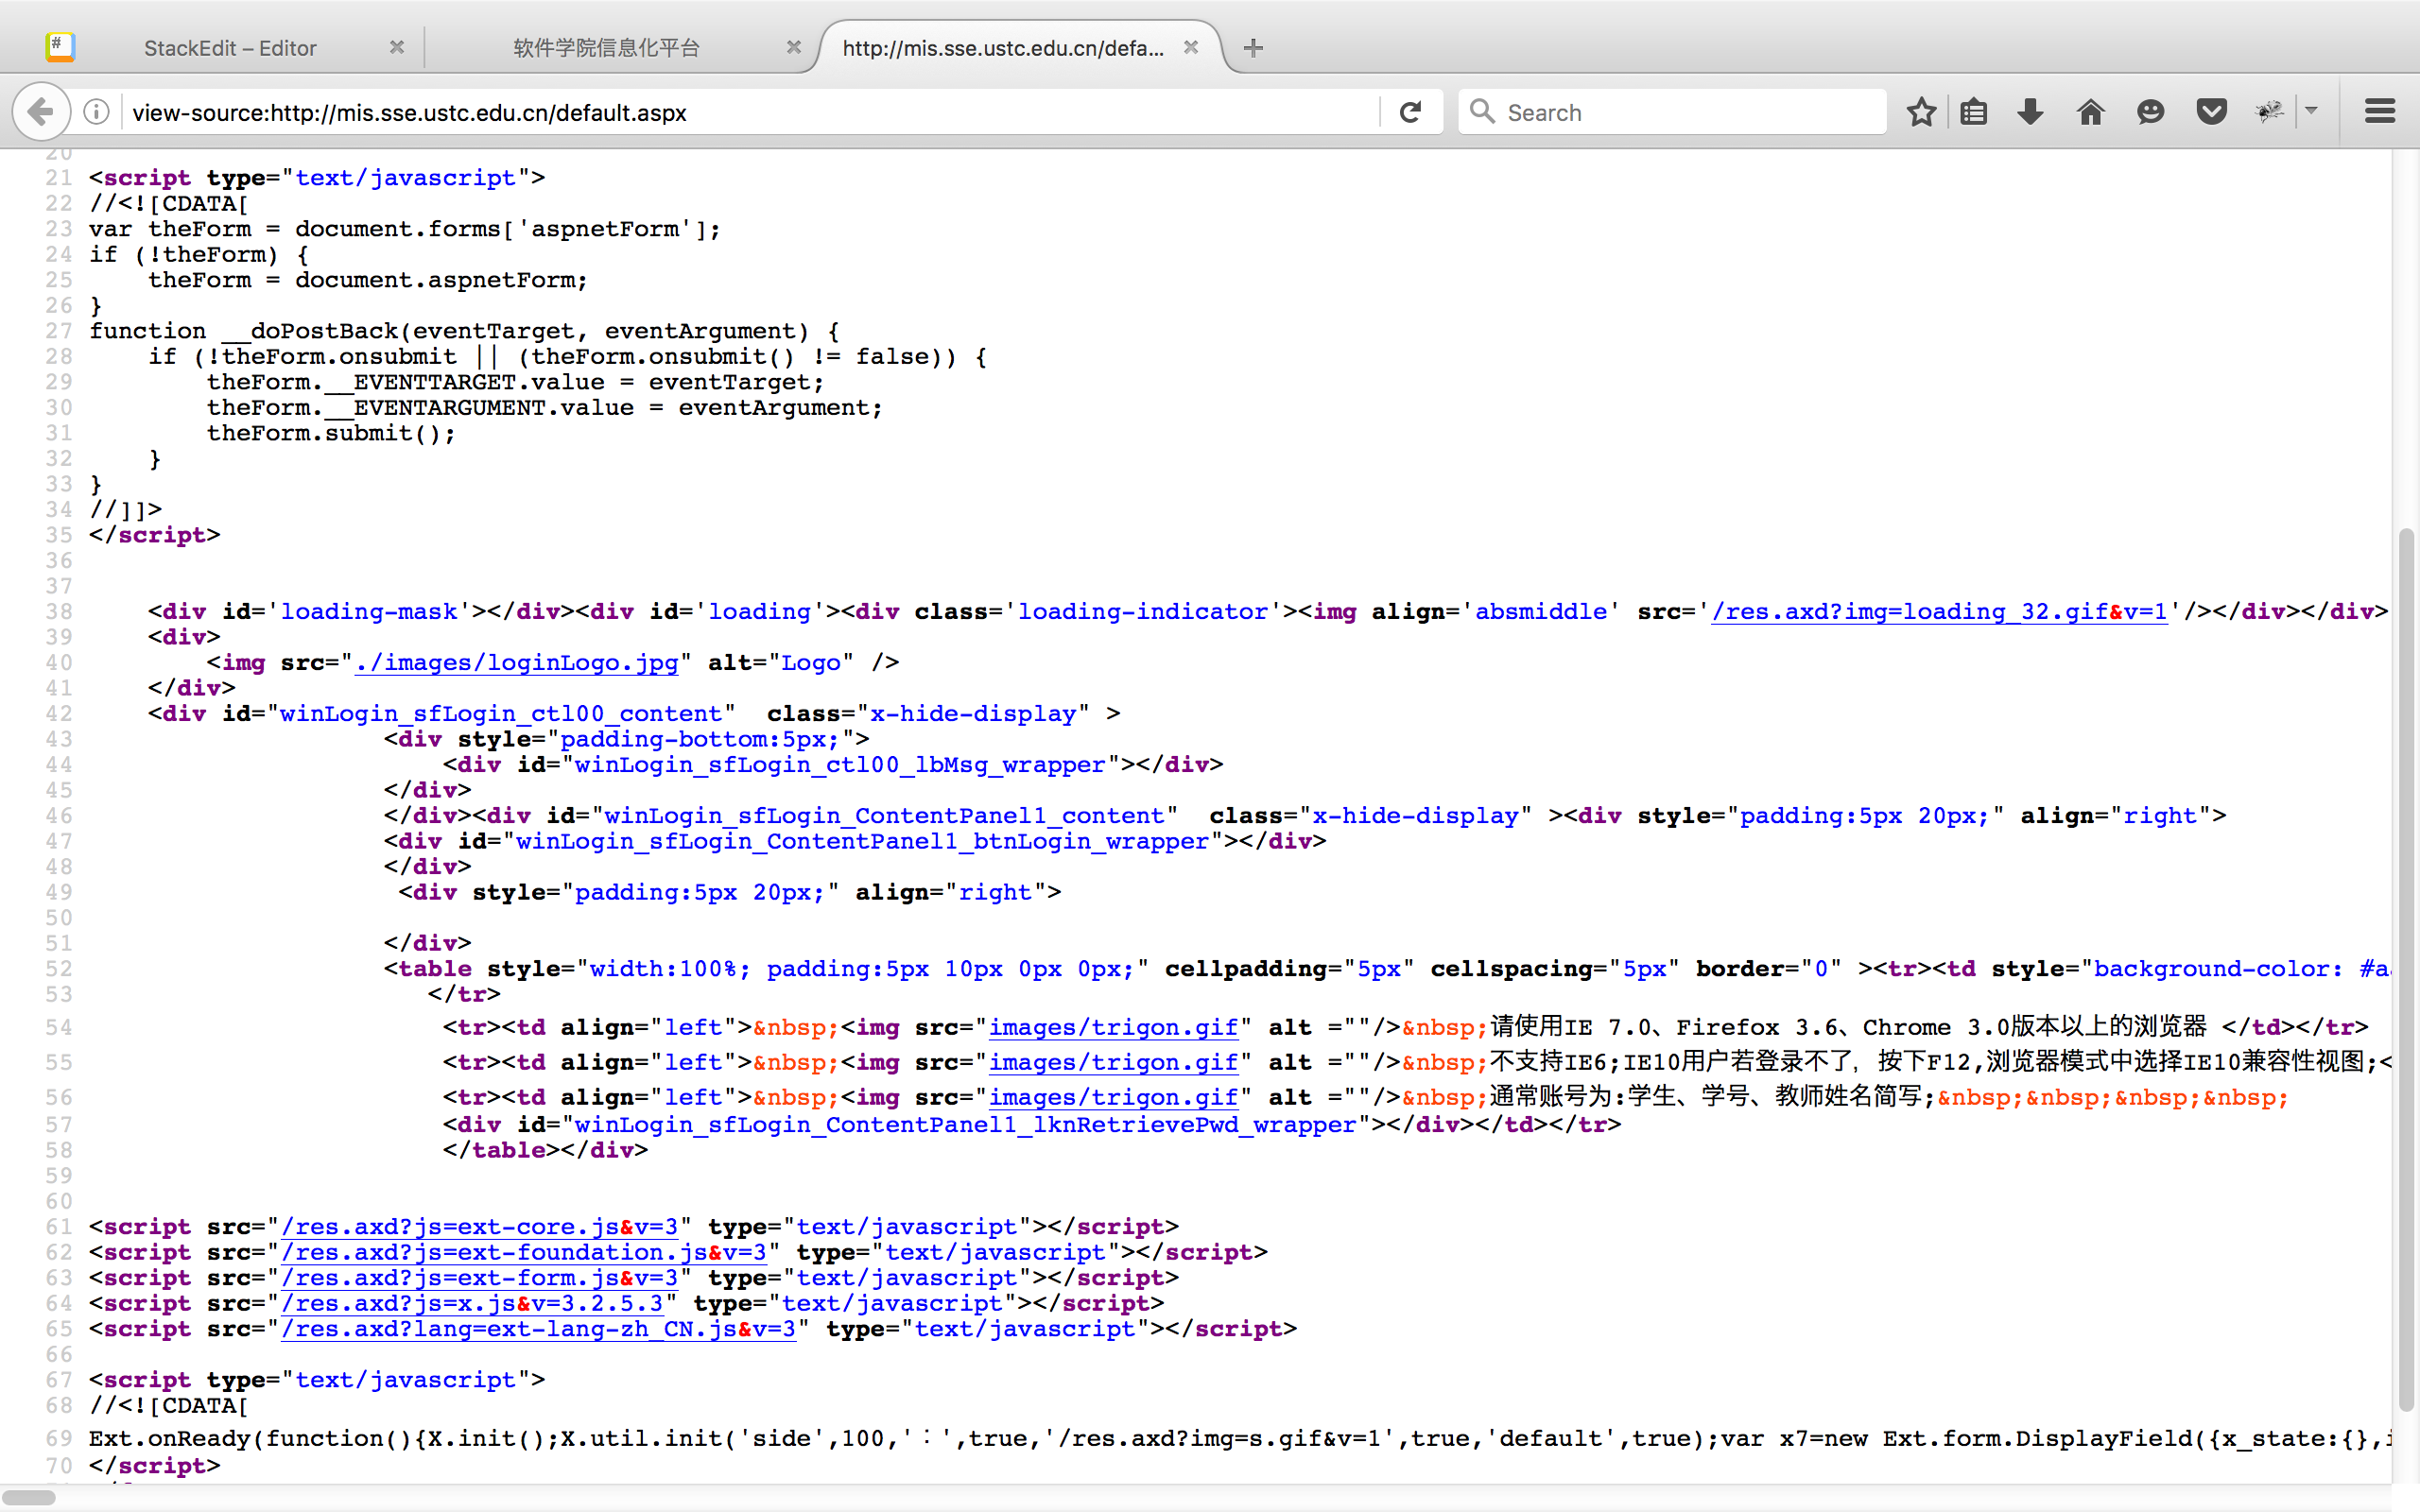
 观察源代码
观察源代码

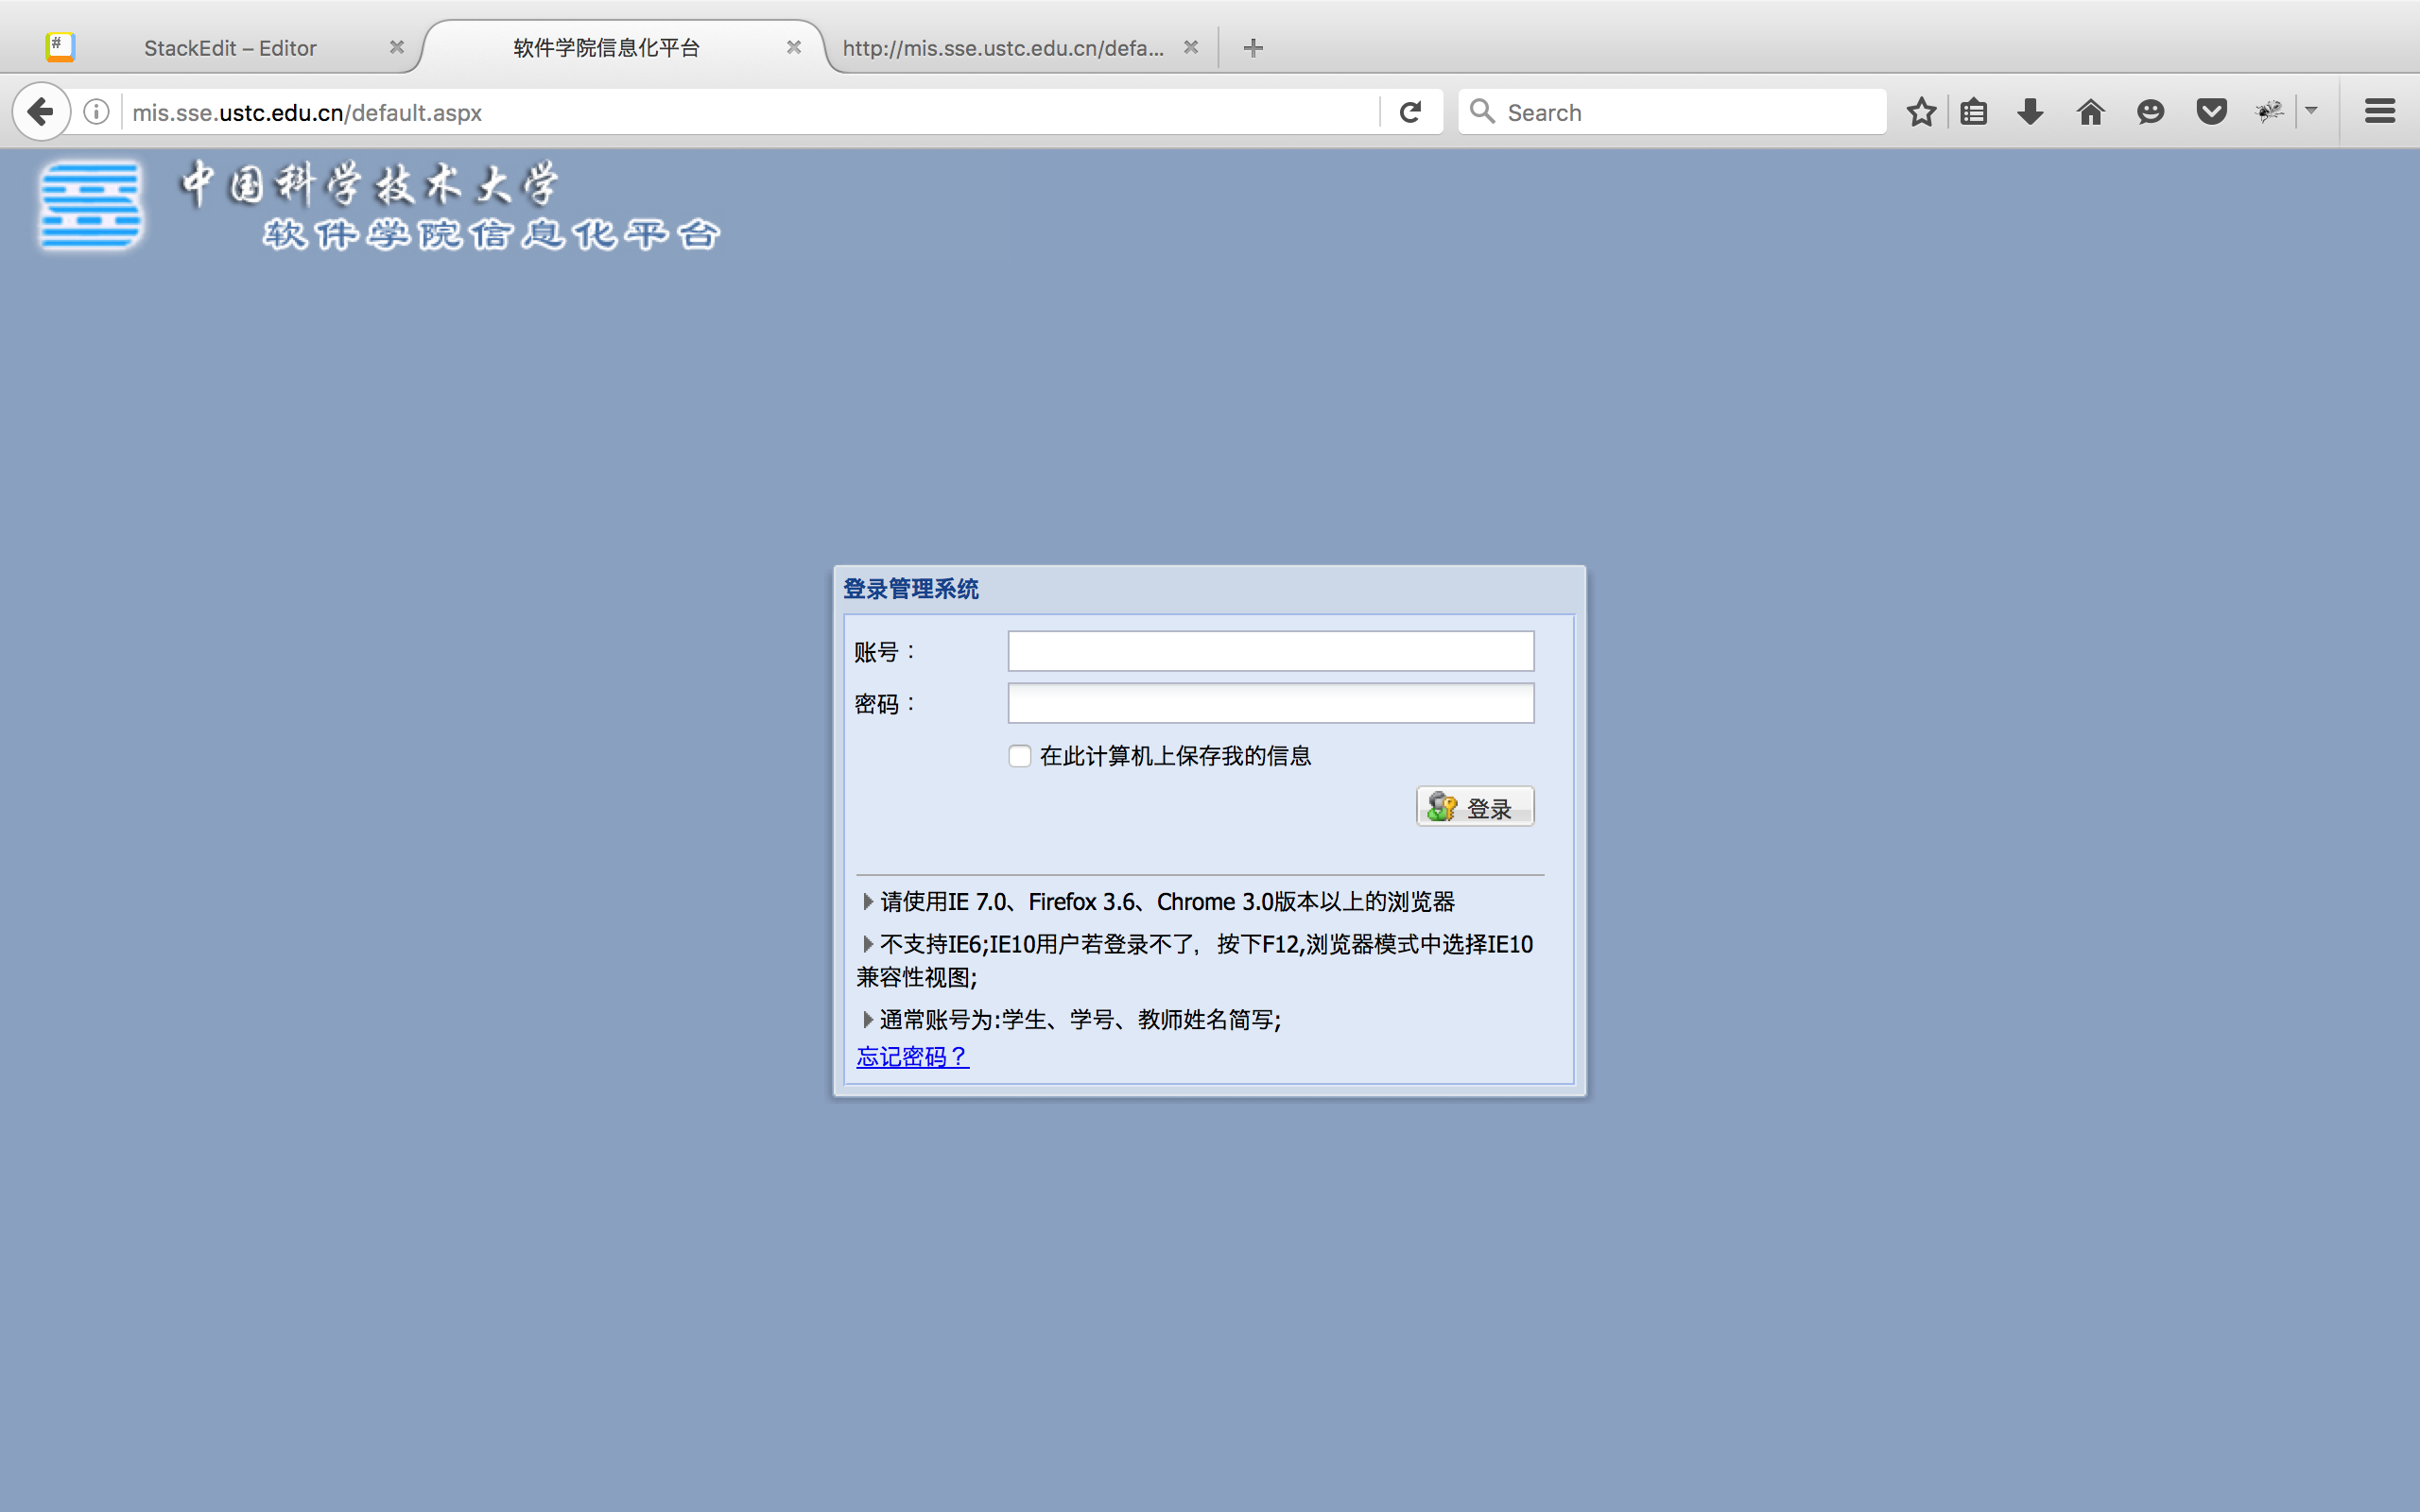
万幸的是没有验证码. 不幸的是登录界面是javascript渲染出来的, 连input标签都找不到, 传统的直接通过requests包进行post操作登录将会遇到困难, 因此我们使用selenium来操作phantomJS登录.
首先通过selenium启动phantomJS:
 1
 2
 3
 4
 5
 6
 7
 8
 9
10
11
12
|
from selenium import webdriver
from selenium.webdriver.common.desired_capabilities import DesiredCapabilities

# set phantomJS's agent to Firefox
dcap = dict(DesiredCapabilities.PHANTOMJS)
dcap["phantomjs.page.settings.userAgent"] = \
    "Mozilla/5.0 (Macintosh; Intel Mac OS X 10.9; rv:25.0) Gecko/20100101 Firefox/25.0 "

# system path you need to config by yourself
phantomjsPath = "/Users/Shawn/Downloads/phantomjs-2.1.1-macosx/bin/phantomjs"

driver = webdriver.PhantomJS(executable_path=phantomjsPath, desired_capabilities=dcap)
|
第一部分对dcap的配置是为了改变user-agent, “伪装"成网页需要的浏览器访问. 这里通过desired_capabilities告诉selenium, 模拟的是OS X10.9下的Firefox 25.0,
第二部分是指出了PhantomJS的可执行文件位置, 根据系统的不同需要自行找到phantomJS的文件地址, 并通过executable_path告诉selenium.
最后一行执行完毕之后driver就启动了, 这时driver相当于启动了一个浏览器窗口. 接着我们用这个浏览器登录, 这里使用了get()方法
1
2
|
login_url = "http://mis.sse.ustc.edu.cn/"
driver.get(login_url)
|
此时相当于往浏览器输入地址, 打开登录界面.
1.2 使用xpath找到需要的元素
接下来我们需要让selenium找到填写账户和密码的文本框, 填写完毕之后再点击登录. 所有这些元素都可以通过强大的xPath找到. 首先使用火狐的firePath找到元素对应的xPath. 右键登录的文本框, 点击inspect in firepath:
 复制找到的xPath, 同理找到其他两个元素, 保存下来:
1
2
3
|
idXpath = ".//*[@id='winLogin_sfLogin_txtUserLoginID']"
pwXpath = ".//*[@id='winLogin_sfLogin_txtPassword']"
loginXpath = ".//*[@id='ext-gen5']"
|
下面就是填写表单登录了. 但是由于js渲染需要时间, 若脚本一打开就填写有可能还没渲染出来, selenium找不到, 因此需要使用selenium为我们准备的WebDriverWait方法
1
2
3
4
|
wait = WebDriverWait(driver, 10)
wait.until(EC.presence_of_element_located((By.XPATH, idXpath)))
wait.until(EC.presence_of_element_located((By.XPATH, pwXpath)))
wait.until(EC.element_to_be_clickable((By.XPATH, loginXpath)))
|
以上三条的意思是让我们的driver一直等到找到了填写账号和密码的文本框, 并且登录按钮可以点击的时候. 如果等10秒还找不到的话, 就raise exception, 报异常了.
接下来就可以填写账户密码, 并点击登录按钮了
1
2
3
4
|
driver.find_element_by_xpath(idXpath).send_keys(username)
driver.find_element_by_xpath(pwXpath).send_keys(password)
driver.find_element_by_xpath(loginXpath).click()
print("Login Success!")
|
首先通过find_element_by_xpath方法找到对应的元素, 再通过send_keys()和 click()方法填写表单和点击按钮.
1.3 登陆完毕后保存cookies备用
 登录完毕之后, 可以看见网页已被重定向到了http://mis.sse.ustc.edu.cn/homepage/StuDefault.aspx, 那么怎样确认网页已经被重定向了呢? 我们故技重施, 在这个页面随意找一个之前登录页面没有的元素, 让selenium等到他出现就是了
1
2
|
redirectXpath = ".//*[@id='RegionPanel1_UpRegion_ContentPanel1_content']/table/tbody/tr/td[2]"
wait.until(EC.presence_of_element_located((By.XPATH, redirectXpath)))
|
完成这些之后, 当爬虫下次登录的时候可以用这次的cookies, 做到免输入直接登录. 这就要求我们把本次登录的cookies保存下来. 虽然selenium对取得cookies有极为方便的方法get_cookies(), 但遗憾的是phantomJS对cookies的格式支持不是那么完善, 直接取用会报错. 因此我们需要定义函数手动整理好cookies的格式并将其保存在一个js文件里, 当下次driver启动的时候可以通过execute_script() 方法直接调用:
 1
 2
 3
 4
 5
 6
 7
 8
 9
10
11
|
def save_cookies(driver, file_path):
    # The format could vary
    LINE = "document.cookie = '{name}={value}; path={path}; domain={domain}';\n"
    with open(file_path, 'w') as fd:
        for cookie in driver.get_cookies():
            fd.write(LINE.format(**cookie))


def load_cookies(driver, file_path):
    with open(file_path, 'r') as fd:
        driver.execute_script(fd.read())
|
通过以上方法, 辅以完善的报错机制, 我们可以把以上登录步骤封装成一个函数, 其完成登录之后就把cookies保存到文件之中, 以便其后的爬虫直接通过cookies登录.
 1
 2
 3
 4
 5
 6
 7
 8
 9
10
11
12
13
14
15
16
17
18
19
20
21
22
23
24
|
def login(login_url, username, password):
    driver = webdriver.PhantomJS(executable_path=phantomjsPath,
                                 desired_capabilities=dcap)
    try:
        driver.get(login_url)
        wait = WebDriverWait(driver, 10)
        wait.until(EC.presence_of_element_located((By.XPATH, idXpath)))
        wait.until(EC.presence_of_element_located((By.XPATH, pwXpath)))
        wait.until(EC.element_to_be_clickable((By.XPATH, loginXpath)))

        driver.find_element_by_xpath(idXpath).send_keys(username)
        driver.find_element_by_xpath(pwXpath).send_keys(password)
        driver.find_element_by_xpath(loginXpath).click()
        print("Login Success!")

        wait.until(EC.presence_of_element_located((By.XPATH, redirectXpath)))
        print("Current url is: " + driver.current_url)
        print("Current cookies are: " + str(driver.get_cookies()))
        save_cookies(driver, r'cookies.js')
    except Exception as ex:
        print("Login failed!")
        print(ex)
    finally:
        driver.close()
|
driver.close() 方法相当于关闭了浏览器, 每次打开浏览器时都要记得最后关闭它. 本文之后还会定义一个 logout() 函数用于退出, 其机制和 login() 类似, 并使用了预存的cookies, 详见源代码.
Selenium除了可以操作phantomJS之外, 还可以操作其他浏览器, 比如Firefox, Chrome等等, 在debug的时候这些浏览器会自动打开并进行模拟, 因此可以获得更清晰的模拟过程. 在debug我们的phantomJS遇到问题时, 也可以用其他浏览器代替, 来观察是哪个细节出错了. 关于其他浏览器请看官方文档的WebDriver API一节, 其安装是很容易的, 使用也只需要一行来代替我们之前使用phantomJS的方法, 例如: driver.Firefox()
2. 爬取动态网页内容
2.1 使用cookies自动登录
有了cookies, 我们的爬虫就可以畅游教务网了. 使用cookies登录的方法很简单
1
2
3
4
5
6
|
scrape_url = "http://mis.sse.ustc.edu.cn/homepage/StuDefault.aspx"

driver.get(login_url)
driver.delete_all_cookies()
load_cookies(driver, r'cookies.js')
driver.get(scrape_url)
|
首先登录主页, 然后使用 delete_all_cookies() 清空自己的cookies, 再载入预先保存的cookies, 然后直接访问要去的地址, 比如 scrape_url 这个子域名. 之所以先登录再访问而不是直接访问是因为cookies的域名必须和driver原先的域名一致, 不然会报错, 因此先登录主页初始化一下域名.
封装一下:
 1
 2
 3
 4
 5
 6
 7
 8
 9
10
11
12
13
14
15
16
17
18
19
|
def scraper(login_url, scrape_url):
    driver = webdriver.PhantomJS(executable_path=phantomjsPath,
                                 desired_capabilities=dcap)
    try:
        driver.get(login_url)
        driver.delete_all_cookies()
        load_cookies(driver, r'cookies.js')
        driver.get(scrape_url)

        if driver.current_url == login_url:
            raise NameError('Redirect failed!')
        print("Scraper login through cookie success!")
        print("scrapping...")
        # Do anything here! Scrape!
    except Exception as ex:
        print("Scraper login through cookie failed!")
        print(ex)
    finally:
        logout(driver, login_url)
|
有了这个函数, 我们就可以使用它的driver任意爬取数据了.
2.2 爬取通知
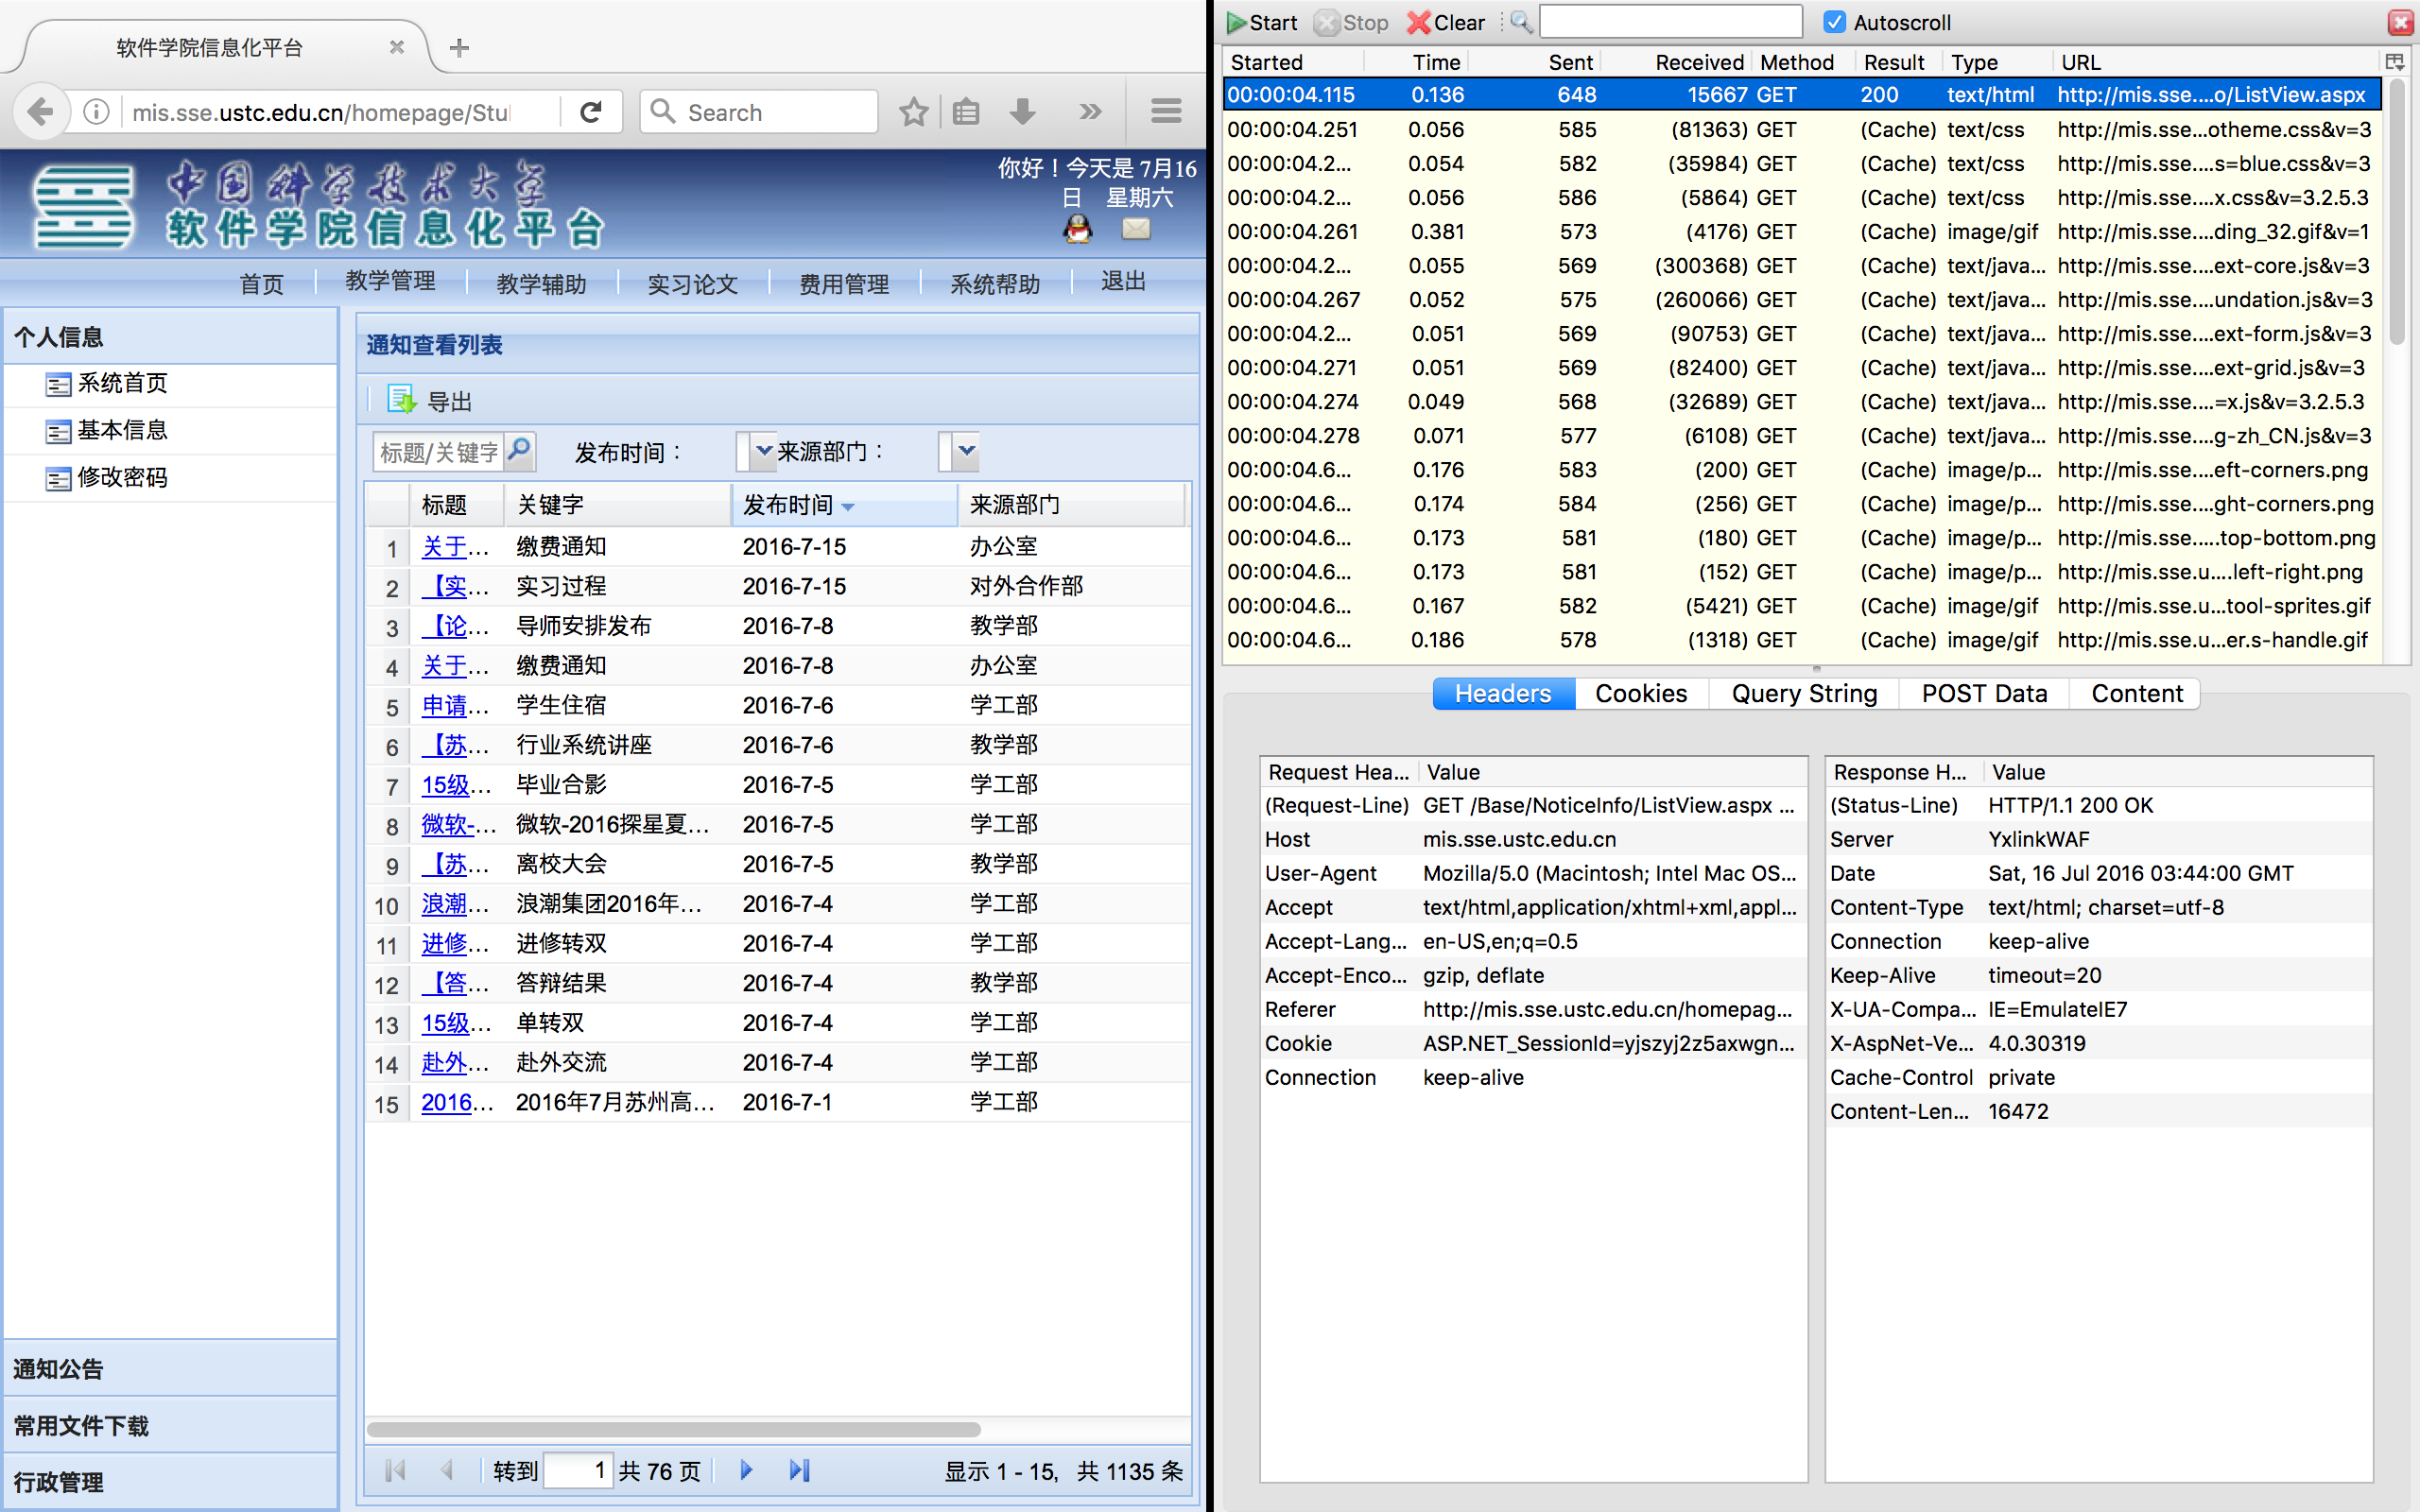
找一找主页有什么可以爬取的? 从通知下手: 点击最新通知右下角的那个more, 转移到一个包含通知的新网页. 新网页似乎是嵌入在某个窗口中的. 我们用httpfox检查一下, 是不是能直接打开这个地址. 回到主页, 打开httpfox, 点击more之前按start检测, 点击完后再按stop停止:

果然, 在第一条下就发现了它的地址:
http://mis.sse.ustc.edu.cn/Base/NoticeInfo/ListView.aspx

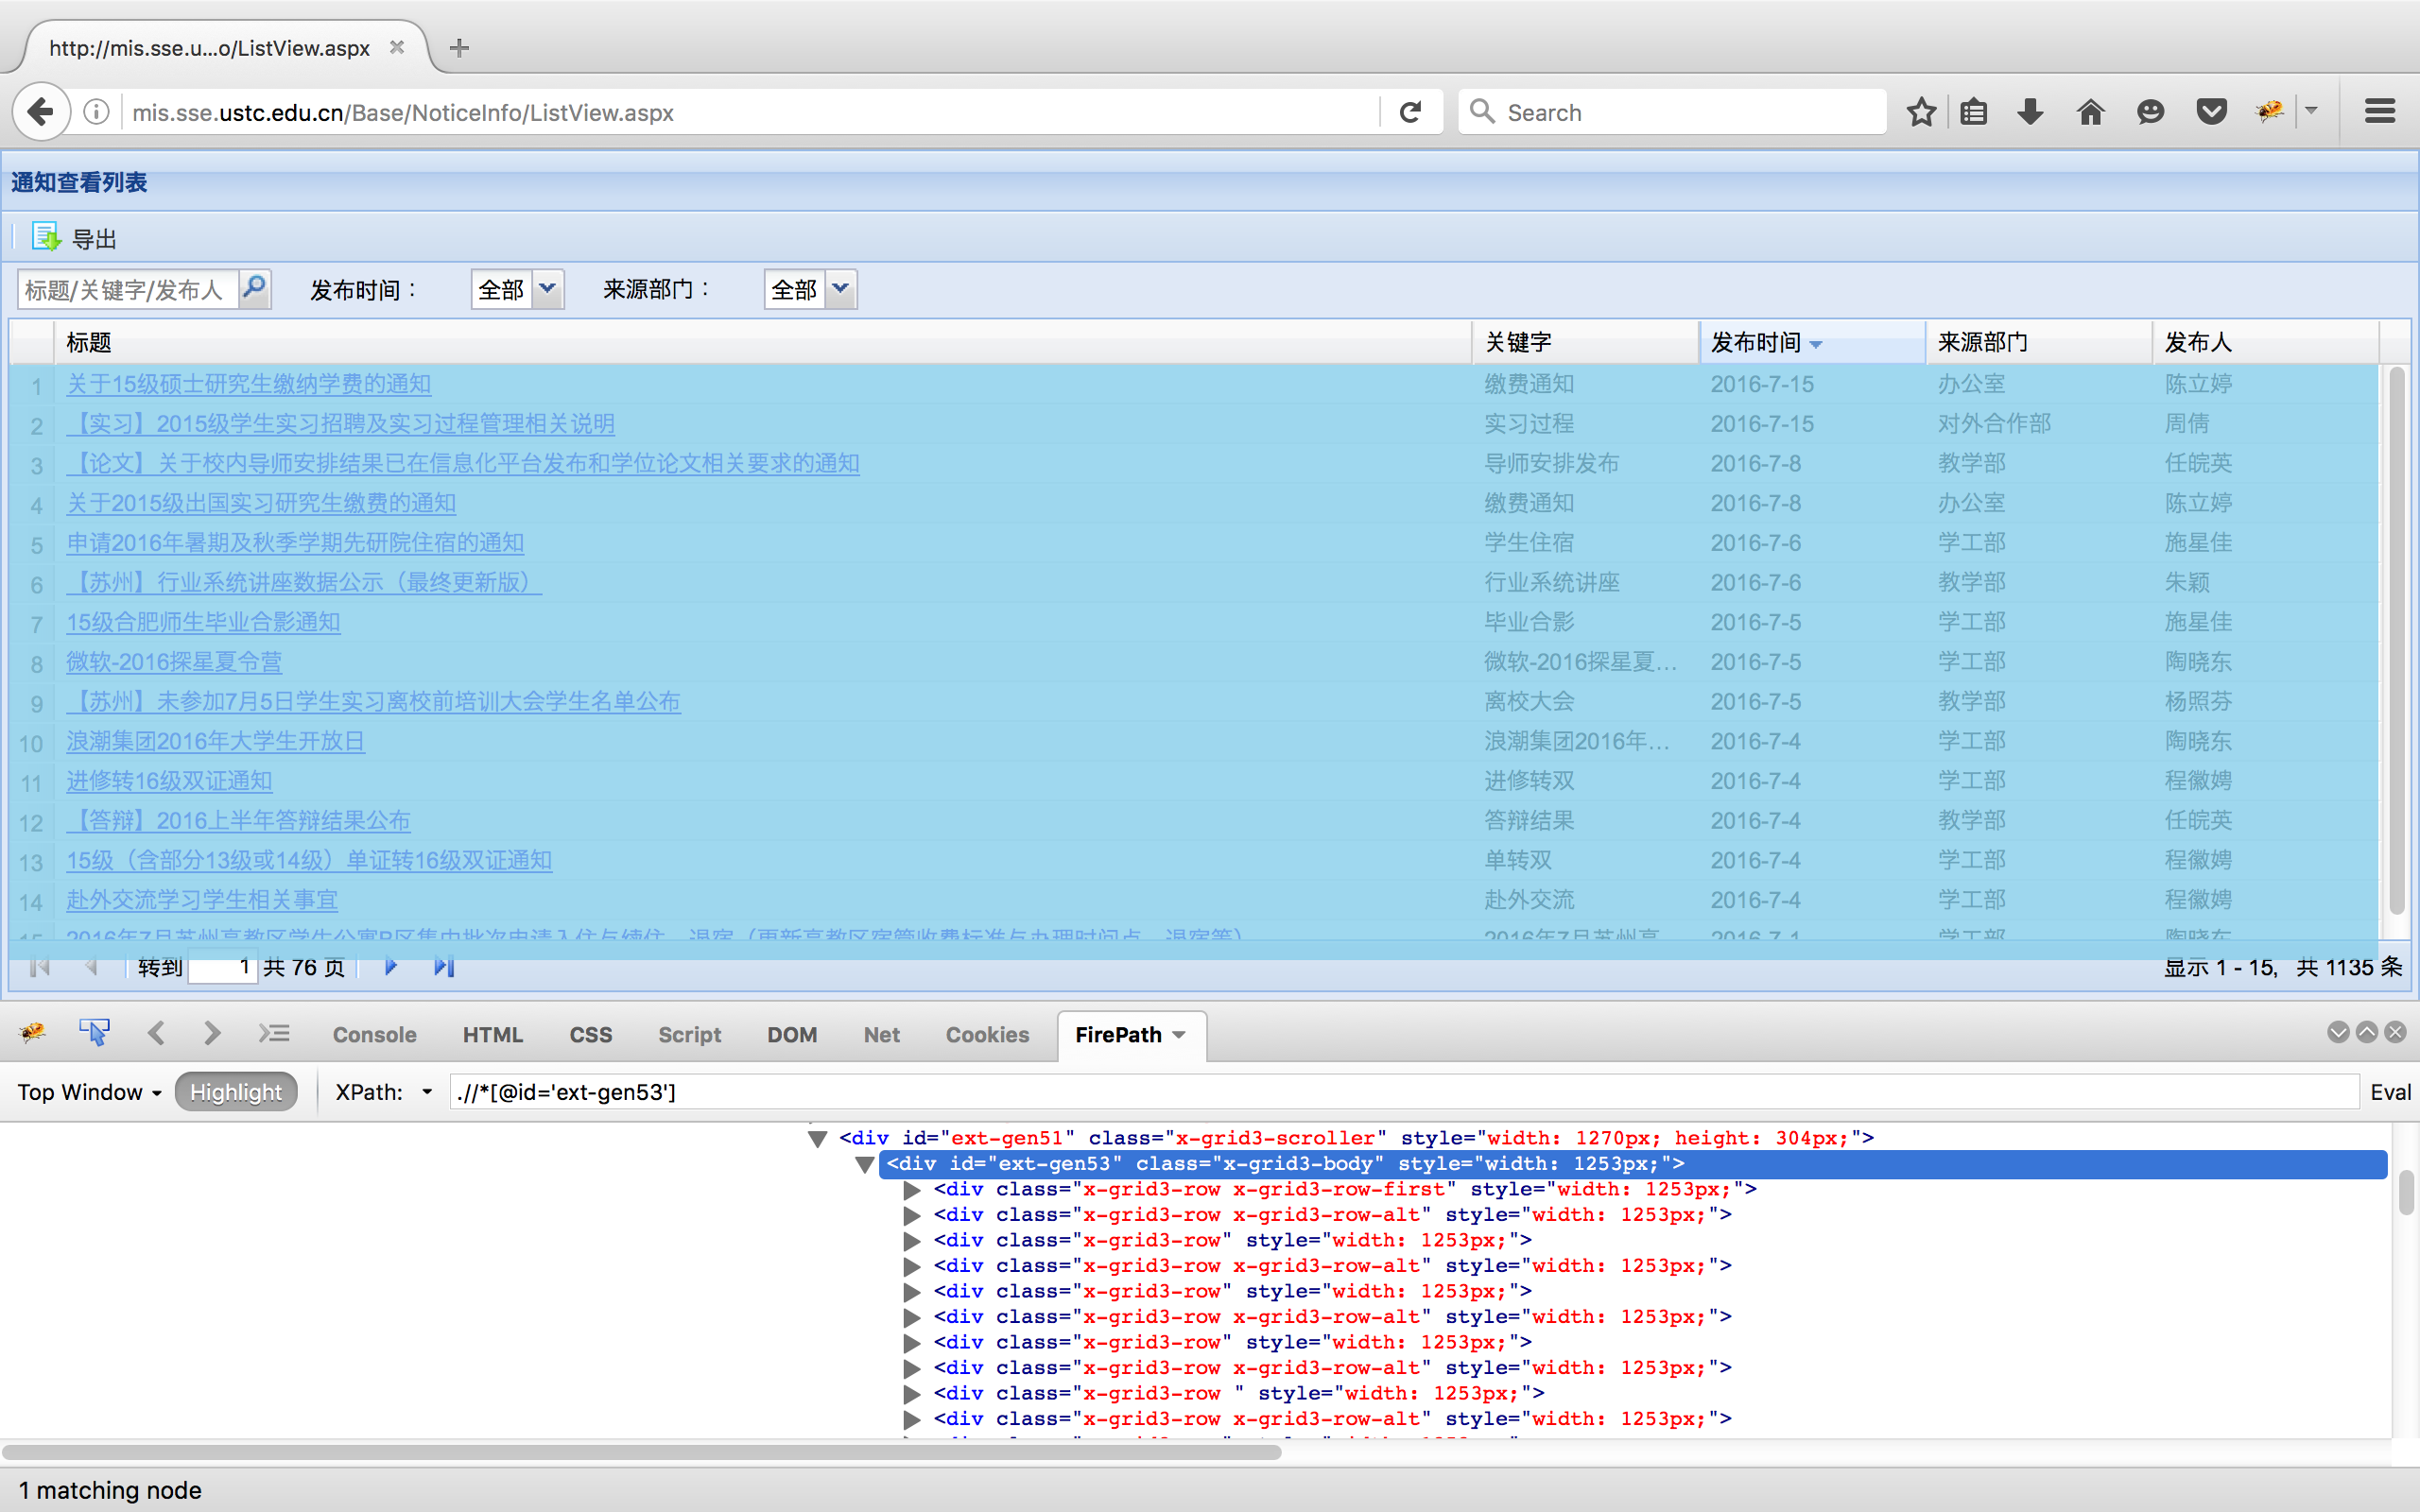
打开这个地址, 正是我们要找的窗口. 接下来就可以使用 driver.get() 打开此地址并爬取通知了. 这里的做法是先用xPath选中整个列表, 把列表信息以html的形式保存下来, 然后用正则表达式匹配其中的链接, 获得所有链接之后一页一页地爬取
1
2
3
4
5
6
7
8
|
import re
infoXpath = ".//*[@id='ext-gen51']"

elem = driver.find_element_by_xpath(infoXpath)
table_source = elem.get_attribute('innerHTML')

reg = re.compile("/Base/NoticeInfo/ViewNotice\.aspx\?ID=[-a-z0-9]+")
link_list = re.findall(reg, table_source)
|
selenium对每个找到的元素, 都可以使用 get_attribute('innerHTML') 方法来获得其完整的html代码. 接着观察一下链接的形式, 发现很容易通过正则表达式提取. 提取完毕后在debug模式下我们可以得到 link_list 的内容:
/Base/NoticeInfo/ViewNotice.aspx?ID=65494f34-8f5c-4183-aa09-153c55a2e842
/Base/NoticeInfo/ViewNotice.aspx?ID=de4b8355-0466-4c0c-8cec-6b152471f0da
/Base/NoticeInfo/ViewNotice.aspx?ID=223acddd-9f5a-48e5-8e3d-151d0737750b
找到链接之后就可以循环提取链接, 把它和域名拼接起来, 使用beautifulsoup保存
 1
 2
 3
 4
 5
 6
 7
 8
 9
10
11
12
13
14
15
|
# 设置保存地址
savePath = "/Users/Shawn/Documents/webscraper/data/"

for link in link_list:
    page_link = login_url + link
    # 取得链接内容的源代码
    driver.get(page_link)
    pagesource = driver.page_source
    # 用beautifulsoup解析页面内容并提取标题
    from bs4 import BeautifulSoup
    bsObj = BeautifulSoup(pagesource, "html.parser")
    title = bsObj.find("span", {"id": "lblNoticeName"}).get_text().encode('utf-8')
    # 保存到本地, 文件名就是标题名
    with open(savePath + str(title)+".html", 'w') as fd:
        fd.write(bsObj.get_text().encode('utf-8') + '\n')
|
最后封装成 rule() 函数嵌入到 scraper() 的 # Do anything here! Scrape! 注释那一行中, 详见源代码.
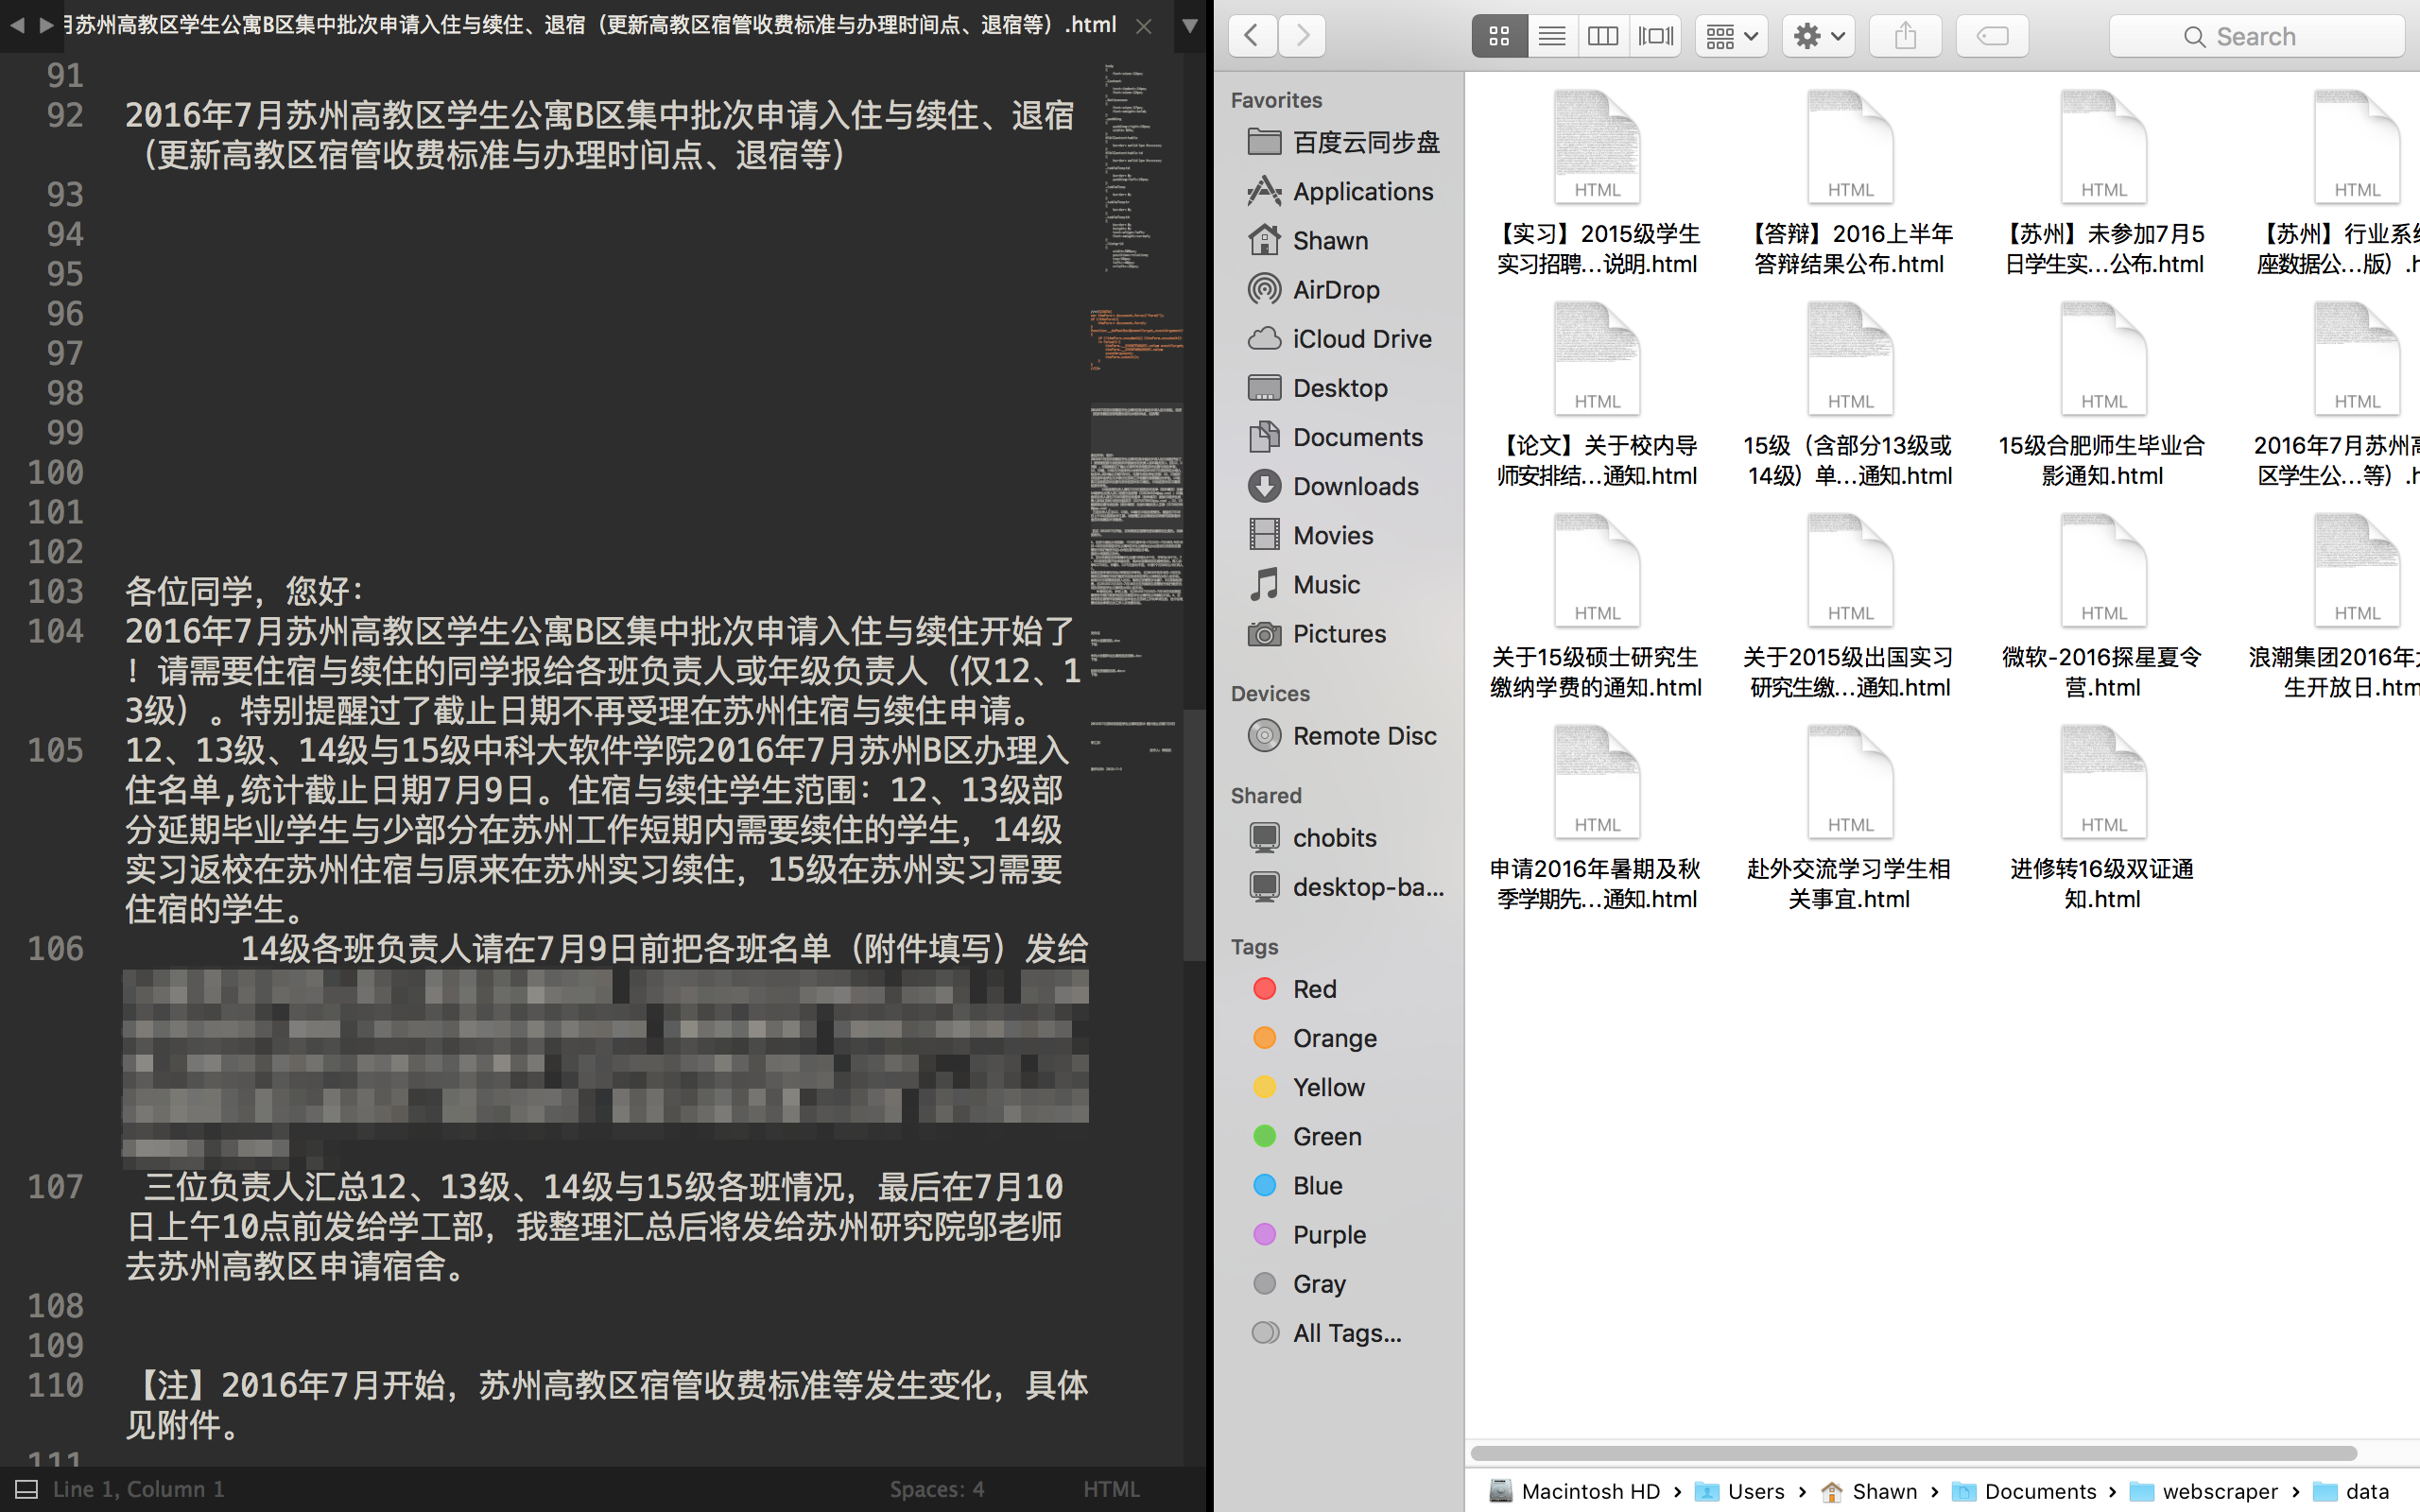
再看一下保存的文件:

格式似乎还没有整理完毕, 文字和css分离了
3. 小结
通过登录, 保存cookies, 爬取网页的过程, 本文介绍了怎样利用selenium+phantomJS操作动态网页. 爬虫的不足之处以及还可以进一步探索的内容有:
- 批量保存文件时将渲染之后的网页源代码保存
- 代码重用性: 在不改变框架的情况下, 如何利用该脚本爬取其他网页
- 如果有验证码, 如何手动登录之后获取cookies再传递给爬虫自动登录, 乃至自动识别验证码
- 如何提高速度: 使用多线程并发的技术同时爬取不同页面
以上内容将在未来进一步完善, 感谢阅读!
Written with StackEdit.
 观察源代码
观察源代码
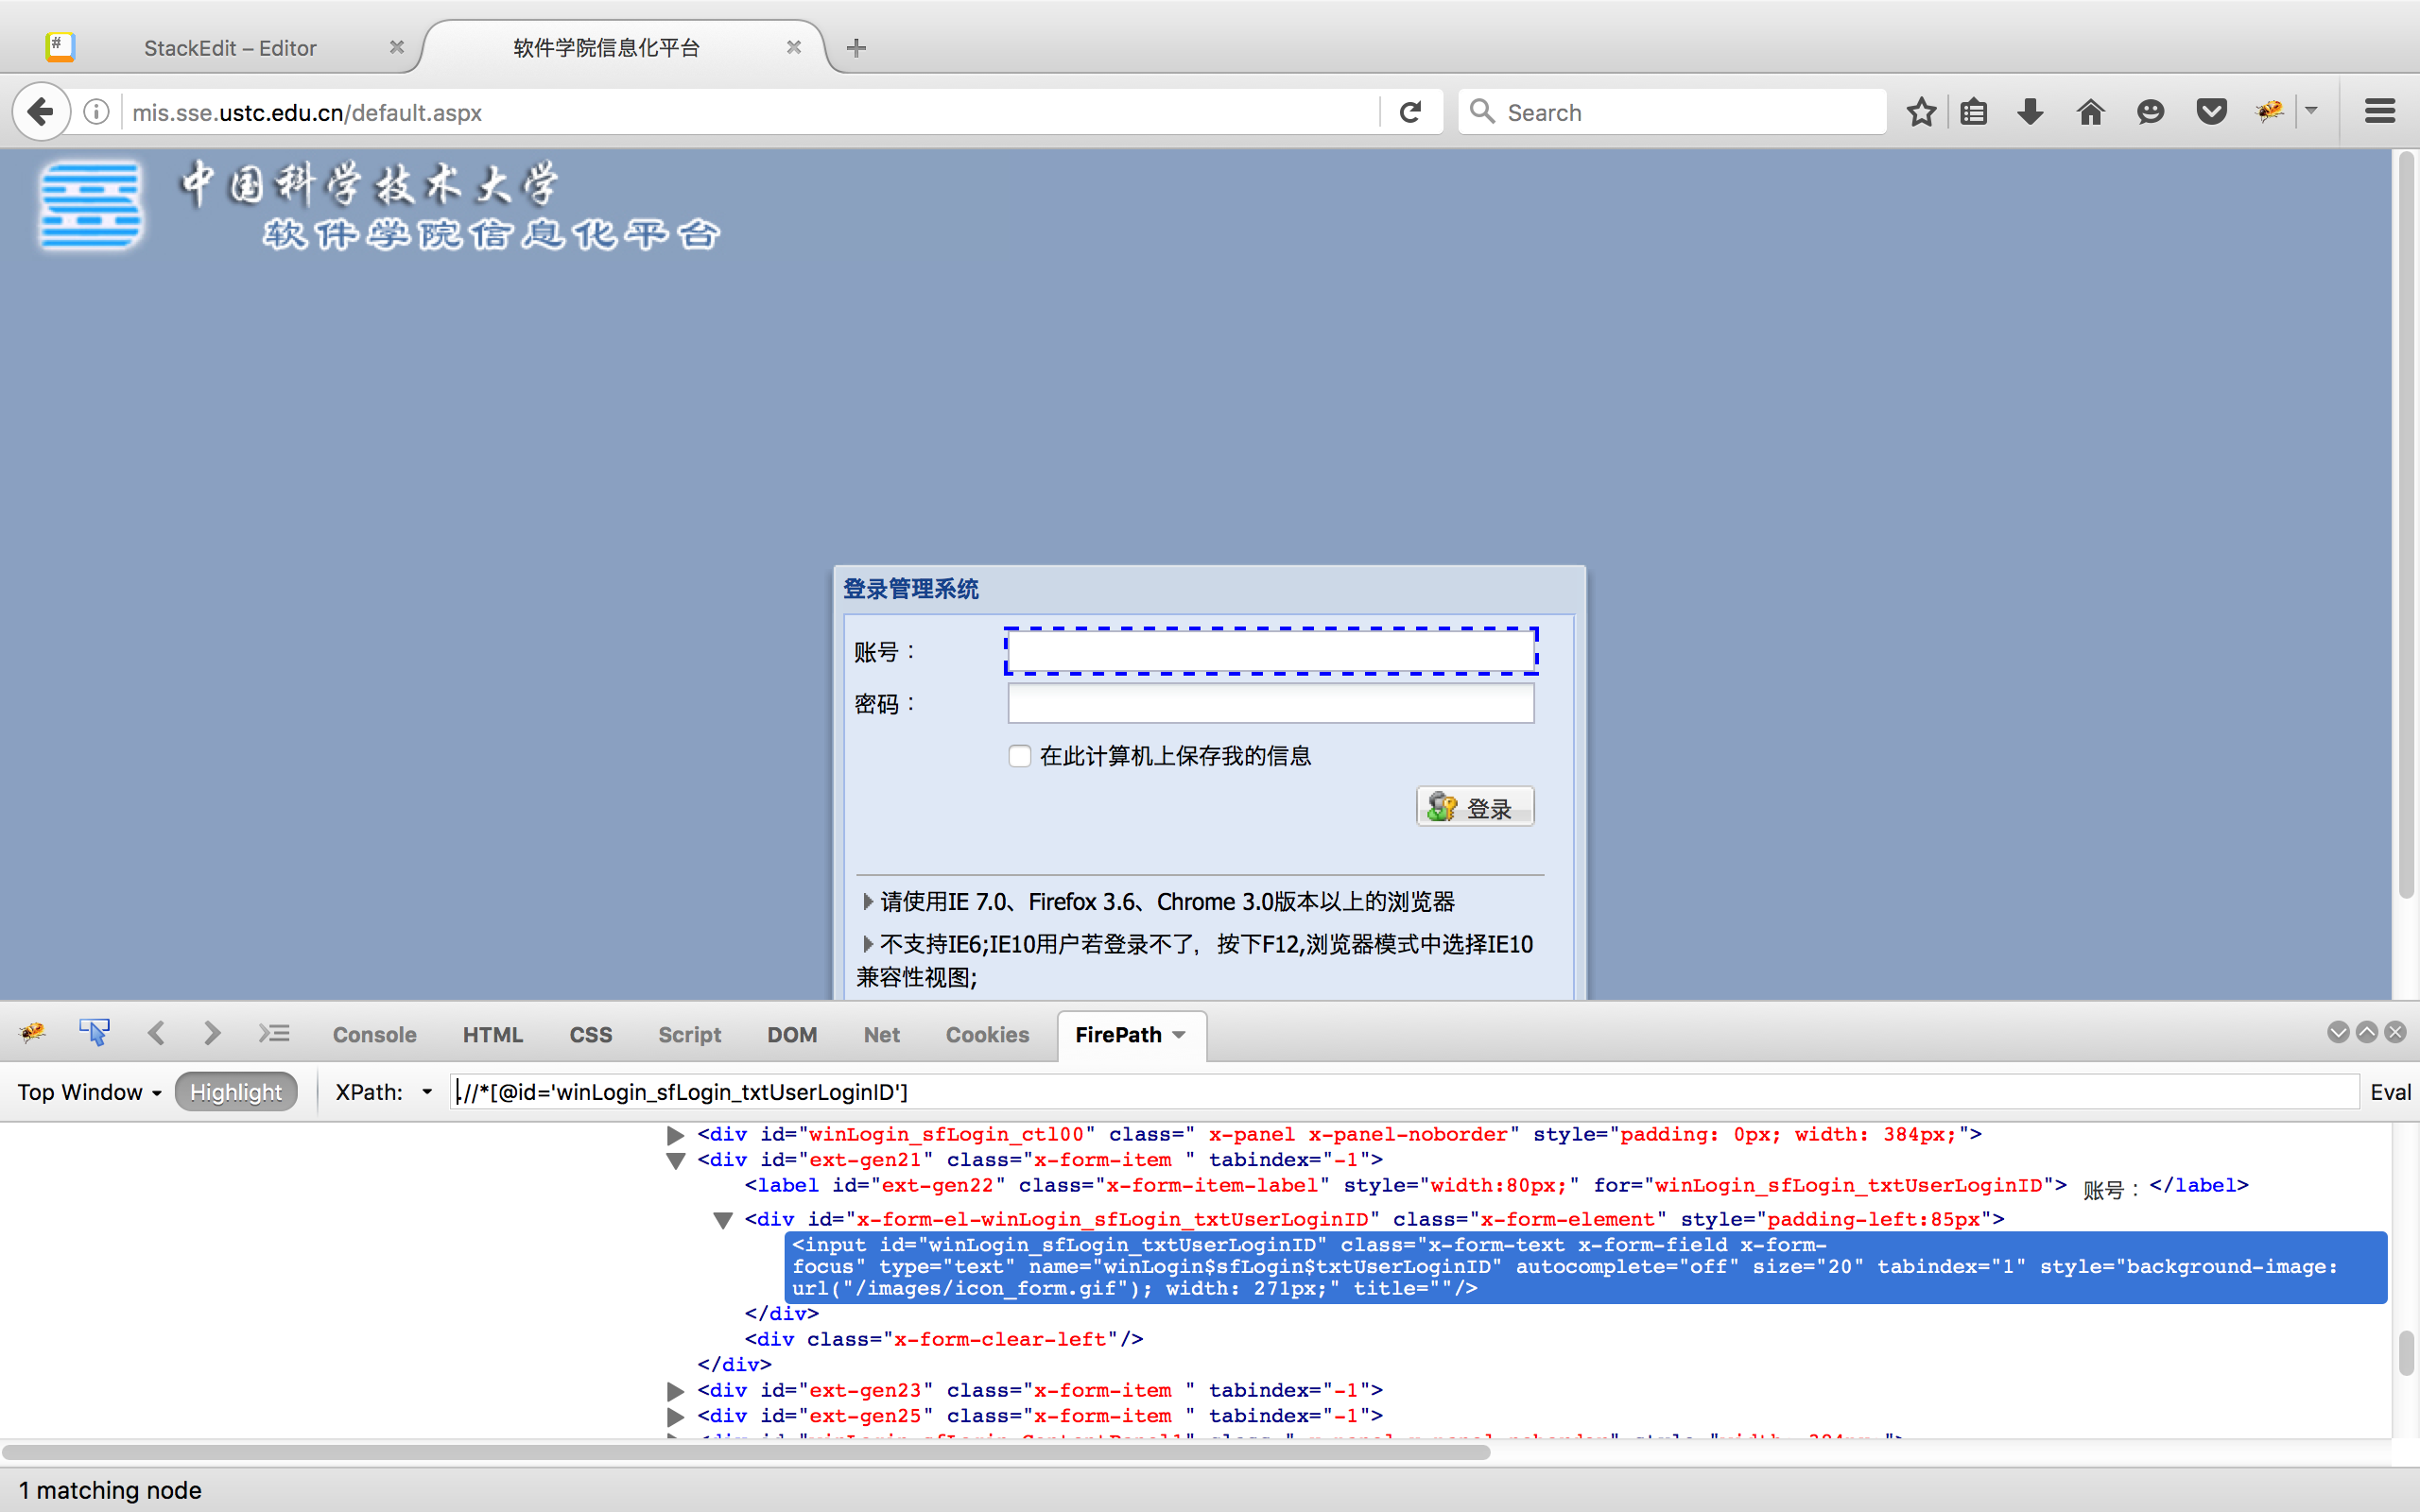 复制找到的xPath, 同理找到其他两个元素, 保存下来:
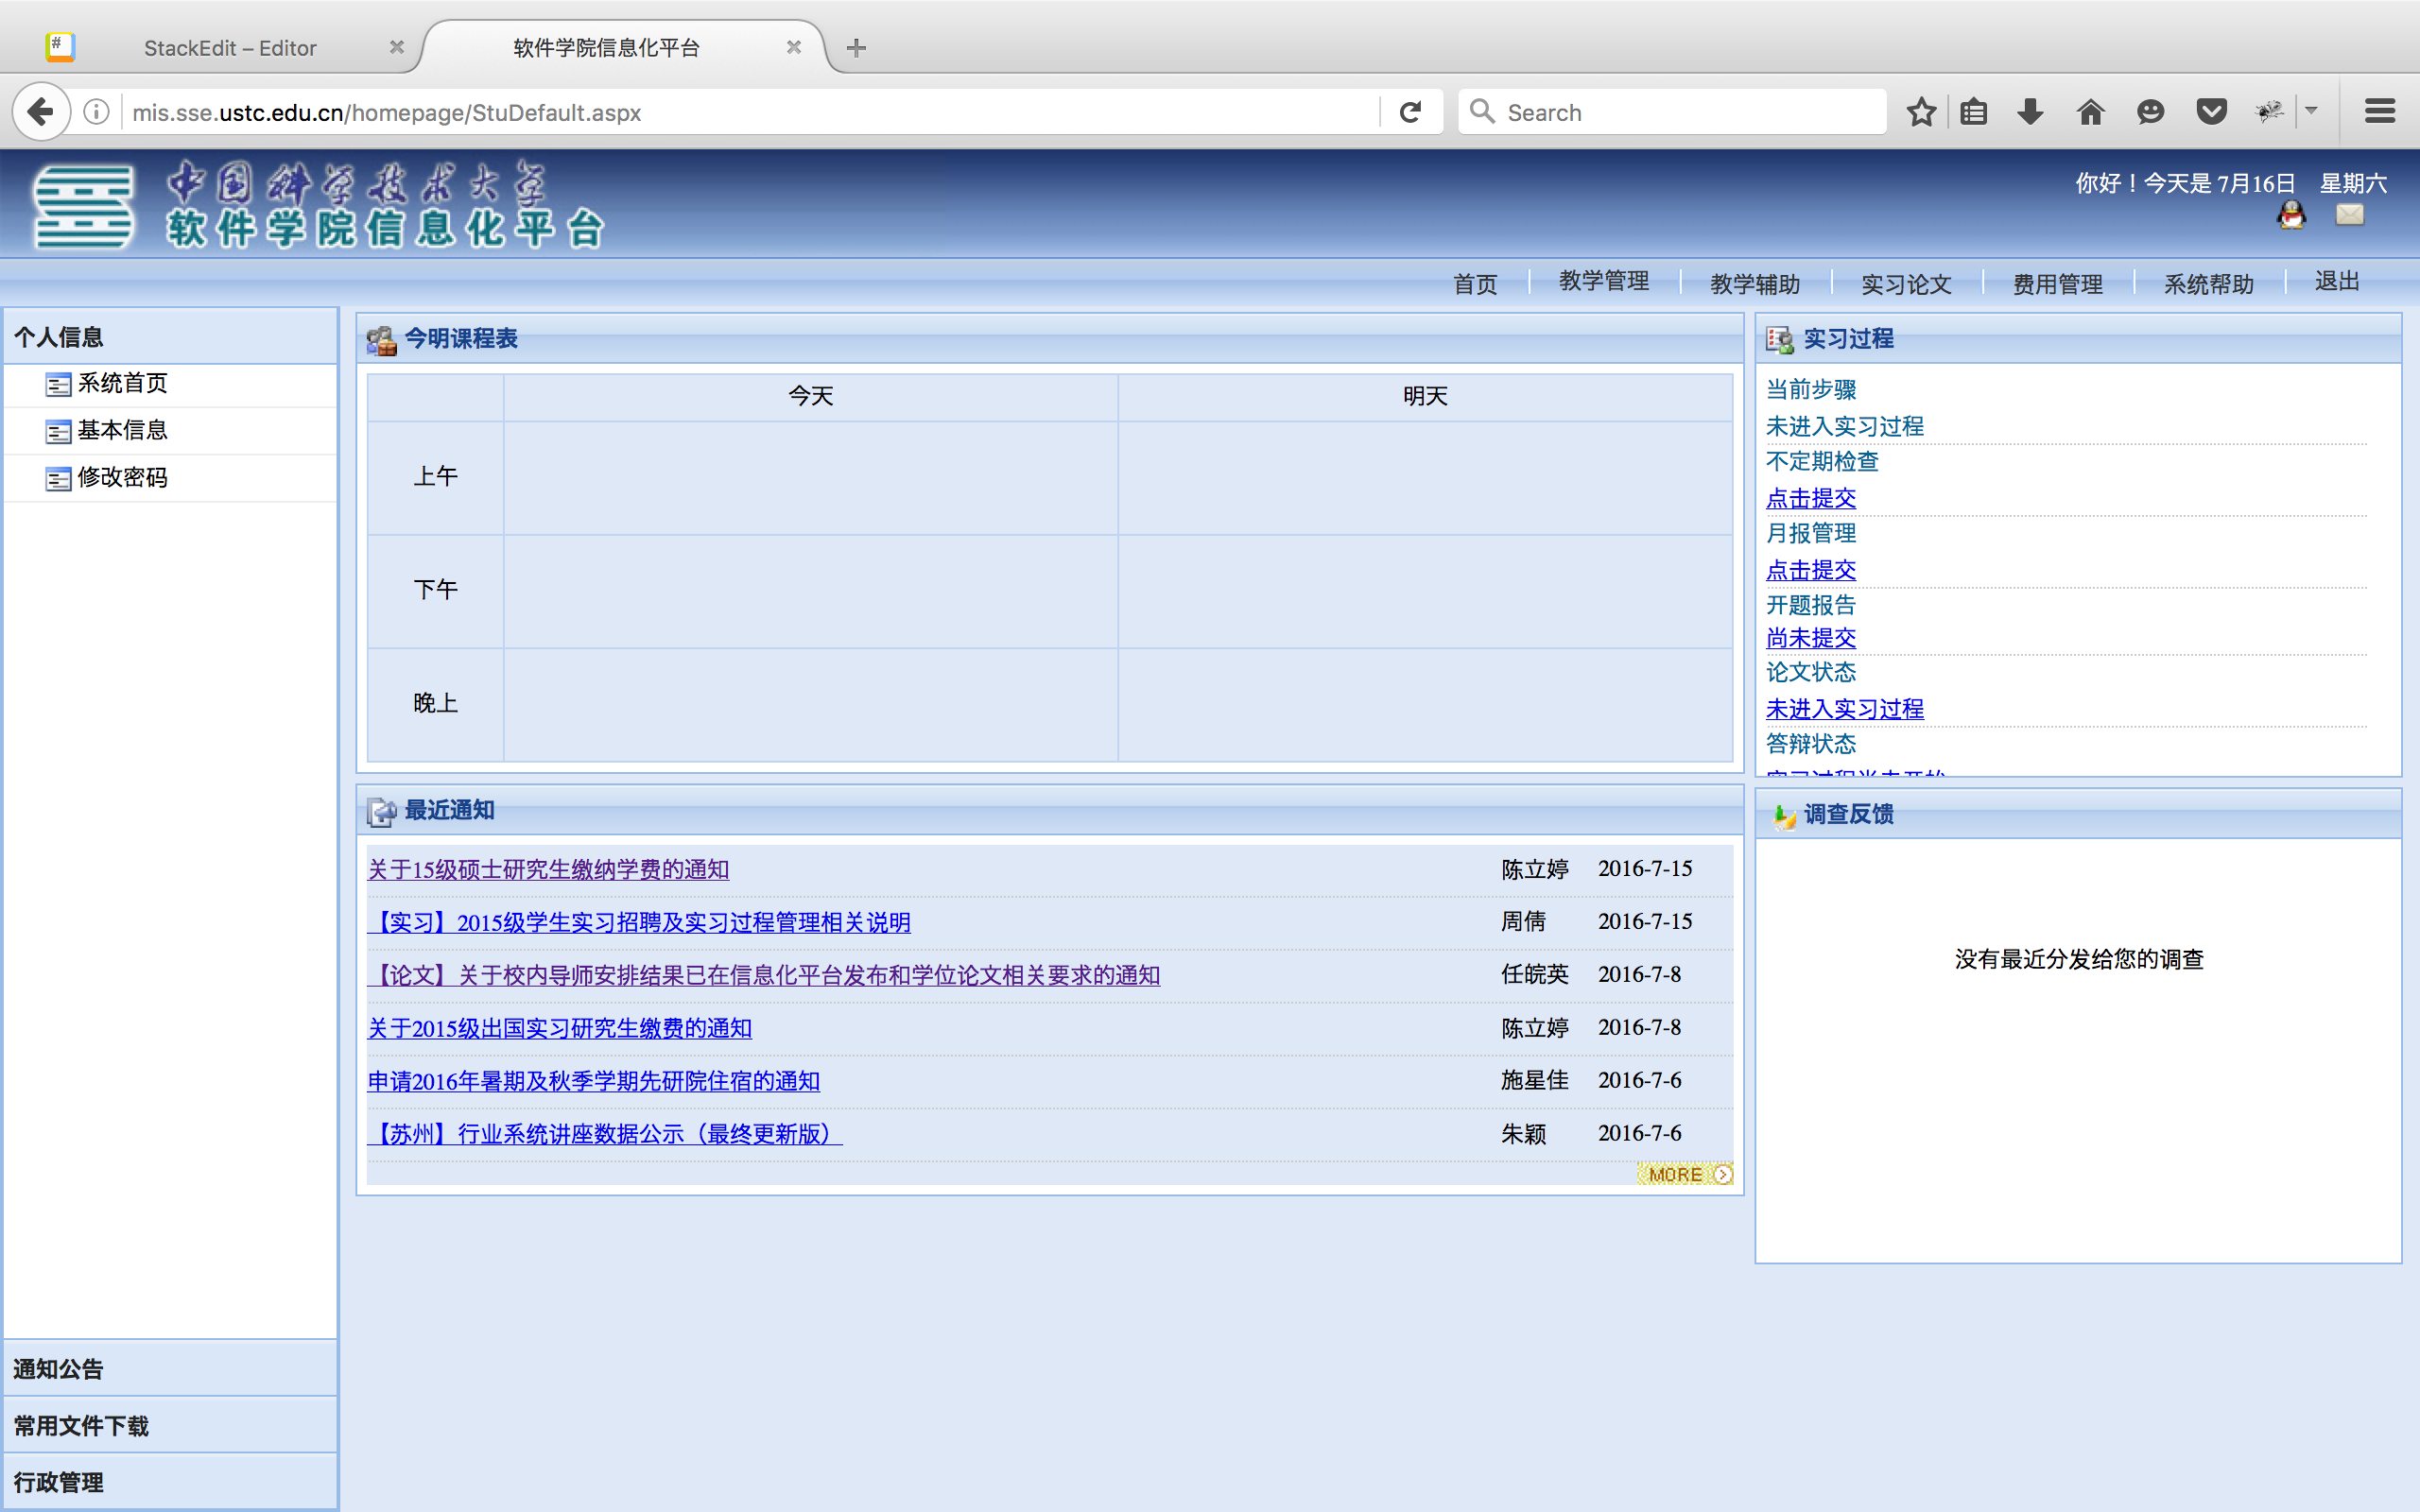 登录完毕之后, 可以看见网页已被重定向到了http://mis.sse.ustc.edu.cn/homepage/StuDefault.aspx, 那么怎样确认网页已经被重定向了呢? 我们故技重施, 在这个页面随意找一个之前登录页面没有的元素, 让selenium等到他出现就是了